Sunday, December 18, 2016
How To Install Android OS On Your Windows Mac OS
How To Install Android OS On Your Windows Mac OS
Hey All Of You Today I Am Sharing A Very Useful Trick Which All You Need Thats How To Install Android OS On Your Windows/Mac Os.Yes,It Is Possible To Install Android In Your PC. Android OS Has Become One Of The Big Hit In Mobile And Computer Technology.In PC Its Easy To Handle Application As We Cant Do In Mobile.There Is Lot Of Ways To Install Android On PC But I Am Telling You The Simplest Way To Install Android On PC.
Requirements -:
1.Virtual Box (Download)
2.Android Os (Download)
Steps To Install Android On PC -:
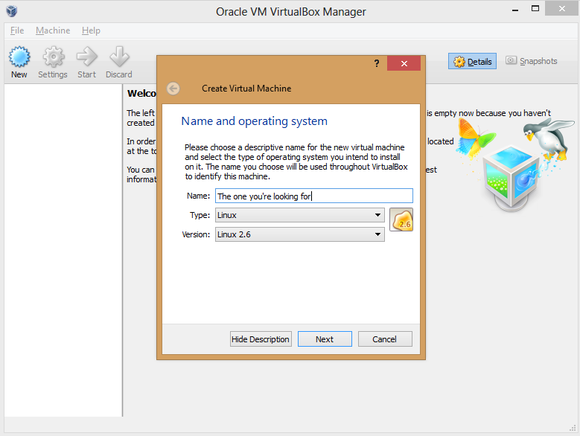
Open VirtualBox and click the big blue Open button in the toolbar to begin. A Create Virtual Machine window will appear. Name your digital Android PC anything you like, but be sure to select Linux as the type of operating system, and Linux 2.6 as the version. Click Next.
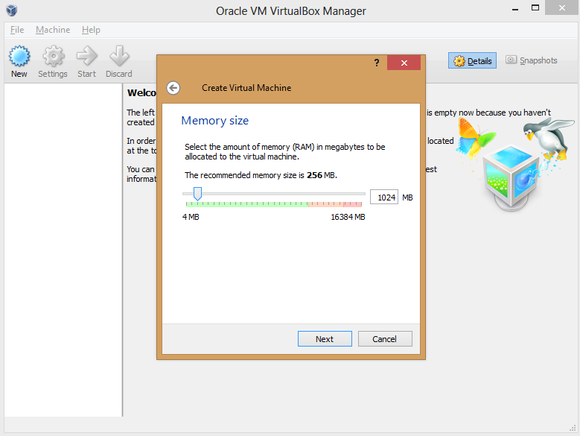
(Remember: Android was made for phones, so it doesn’t take much space, even with multiple apps installed.)
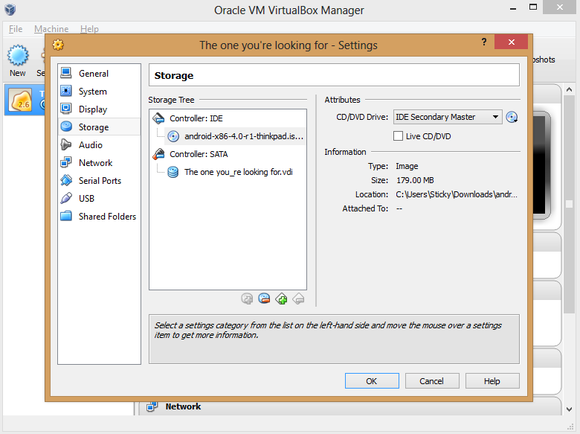
Next, you need to point the VM at your Android-x86 ISO. Click the Storage button in the VM manager and, in the window that appears, select the Empty option underneath ‘Controller: IDE’ to bring up various ‘Attributes’ options to the right. There, click the disc icon to the right of ‘CD/DVD Drive’ and select Choose a virtual CD/DVD disk file from the drop-down menu that appears. Simply browse your hard drive and select the Android-x86 ISO to load it in the virtual machine, and then click OK when you’re done.
Got it? Great! Now you’re ready to install Android on your PC. The process is a bit trickier than your standard Windows installation.
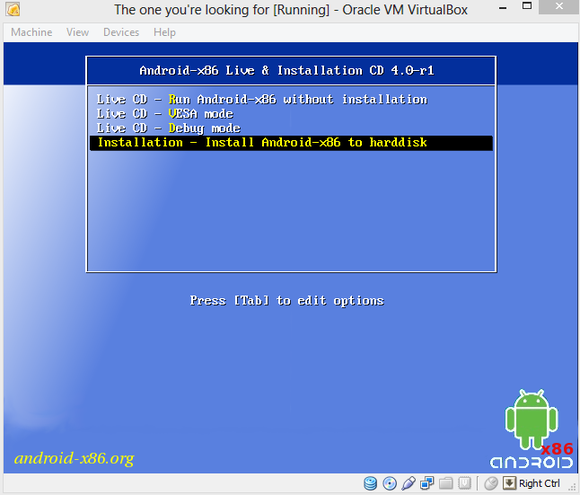
Click the name of your Android-x86 VM in VirtualBox’s left pane, and then click the big green Start arrow. After clicking OK on any dialog boxes that pop up—be sure to read them!—you’ll quickly notice that you can’t use your mouse during installation. Use the arrow keys to scroll down to Installation, and then press Enter. Press Enter to select Create/Modify partitions on the next screen as well.
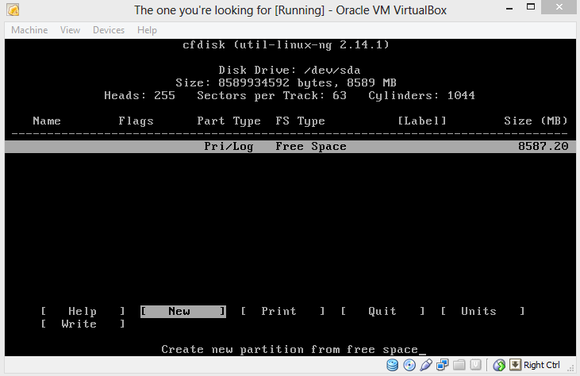
If you usually stick to graphical interfaces, the next menu may throw you for a loop, but it’s nothing to be scared of. Just navigate to New and press Enter again. Select Primary as the partition type, and then press Enter once more to set the partition to the default size. You’ll see the following screen.
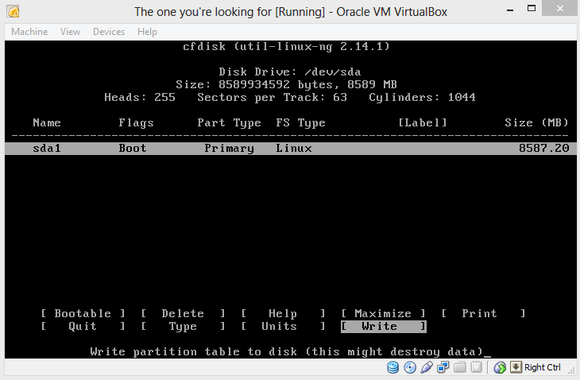
Press Enter on the Bootable option, which should add ‘Boot’ under the ‘Flags’ listing, next to the computer name. With that done, select the Write option. A warning appears, threatening that writing to disk will wipe any data already on the disk. Who cares? This is a virtual machine, you silly installation software. Type yes, and then press Enter yet again.
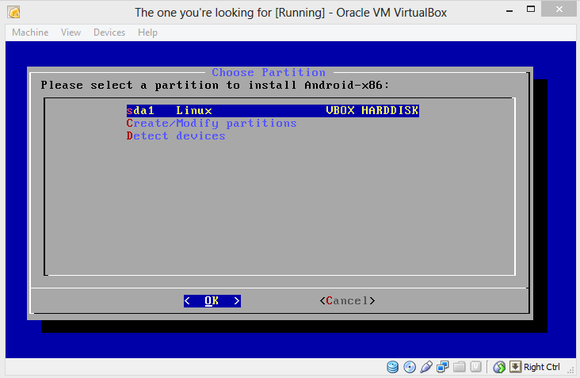
Highlight the Quit option and press Enter to return to the Choose Partition screen, which now lists the ‘sda1’ partition you created on the virtual hard drive. Press Enter again. You’ll see a list of formatting options. Select ext3, press Enter, and select Yes when asked if you really want to format the disk.
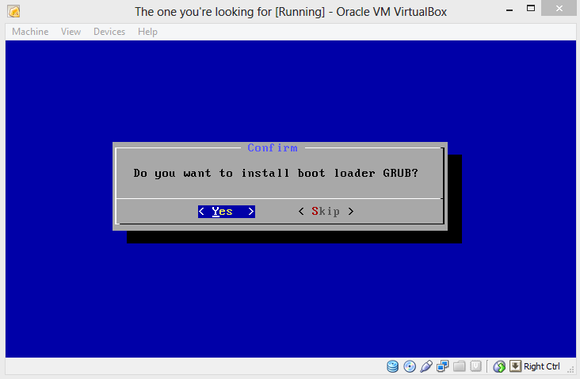
Do you want to install boot loader GRUB? Yup! You also want to install the /system directory as read/write when asked.
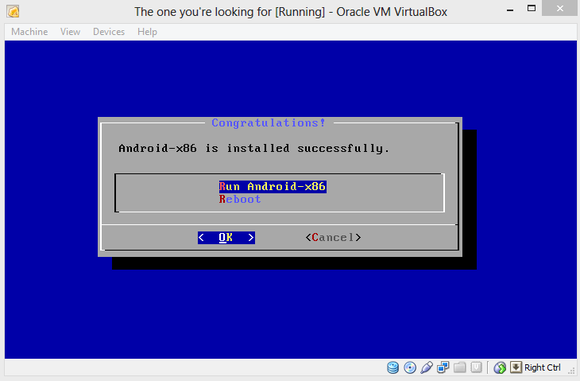
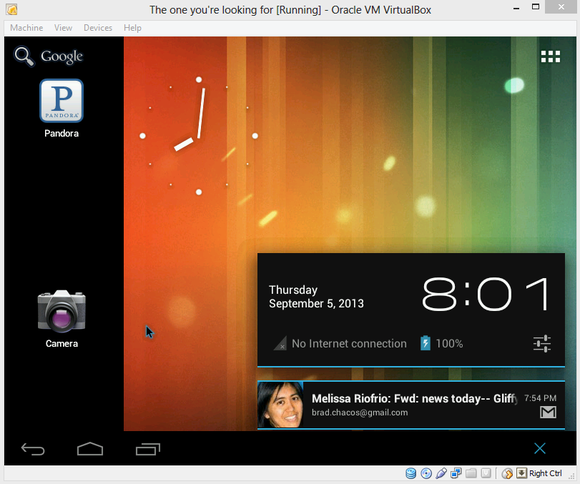
And there’s the screen we have been waiting for to Run Android-x86
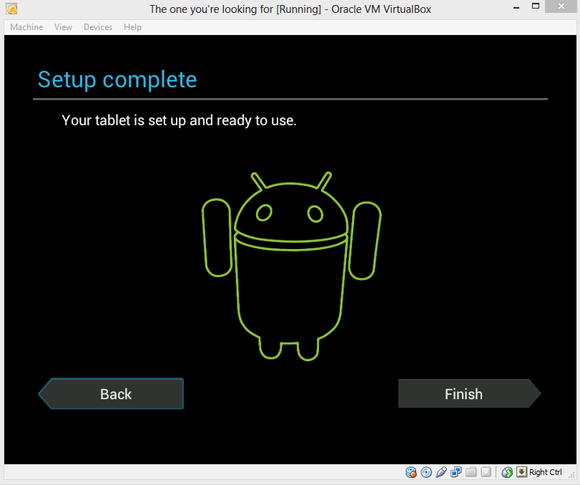
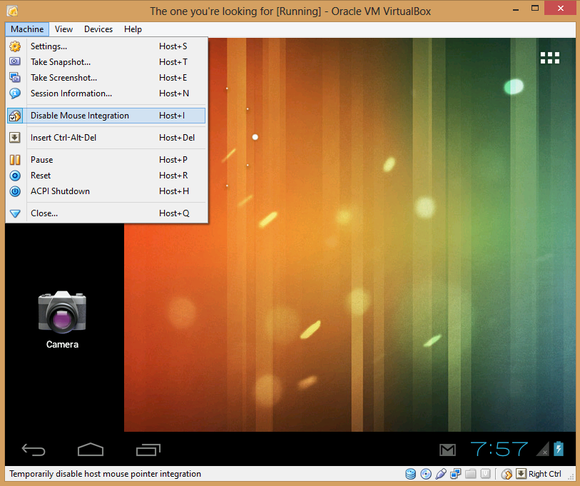
You’re going to set up the operating system the way you would on a new Android phone or tablet. It’s pretty straightforward, and you can even connect the Android-x86 VM to your Google account. But before you do that, you need to coax a mouse cursor on screen, because trying to navigate a touchscreen-optimized OS by keyboard is maddening.
Don’t expect a flawless experience with Android-x86. You can’t sync your Google account’s apps to the VM, despite what the setup process implies—at least not yet. (Fortunately, Android-x86 ships with Google Play installed, and most apps I’ve tried work just fine, though you might notice the occasional wooziness.) Nor does the virtualized OS work with any of the touchscreen displays I’ve tried. And yes, performance can be kind of poky, no matter how much RAM you toss at Android-x86.
Dont Forget To Like And Follow..

Available link for download